
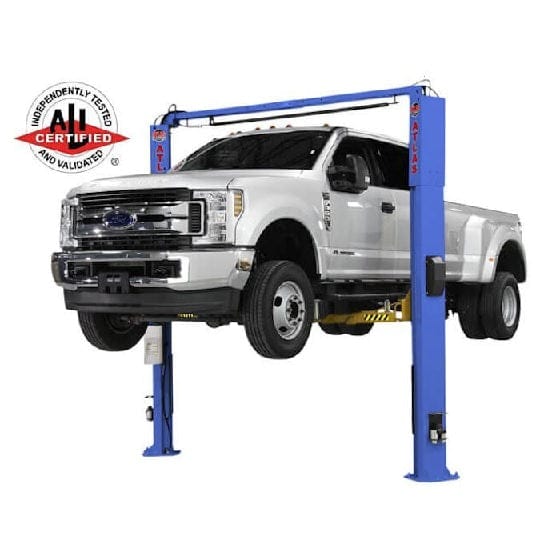

How to Position a Car on a 2-Post Lift
Proper 2-post car lift positioning is obviously not something you can take lightly - it directly influences safety. We’ve put together this guide on how to position a car on a 2-post lift so you can get started using your new equipment with peace of mind.
My Garage Supplies is your trusted choice for a 2-post car lift online. We carry the top models from the most trusted brands the industry has to offer, always backed by competitive pricing and world-class customer service. Be sure to connect with our team if you don’t already have a car lift for garage. In the meantime, let’s get into how to use a 2-post car lift correctly!
How to Use a 2-Post Car Lift: Step-by-Step Guide
First things first, your car lift should have come with a user manual and other documentation on safe operation. You should have read those front to back by now. There are nuances between car lift models/manufacturers, be it Bendpak vs Atlas, after all.
That being said, the basics of how to position a car on a 2-post lift and safely raise/lower it are pretty standardized. It starts with a pre-lift safety inspection.
Pre-Lift Safety Checks
Take a minute to look over the lift itself and confirm the arms can swing freely, pads are not cracked, and adapters are evenly stacked. Look at the floor around the posts for loose anchors, oil, or debris that could pose a risk.
It’s not a bad idea to raise the carriage slightly (without a vehicle) to confirm the locks cycle properly. Listen for the lock pawls clicking into the ladder. Inspect equalizer cables or chains for fraying or uneven tension. If the lift uses a floorplate, make sure nothing is sitting on it that could interfere with arm movement.
It’s also worth removing any loose cargo from the trunk or bed of the vehicle. Verify doors can open without striking posts, and check that the weight rating of the lift exceeds the vehicle’s gross weight.
Choosing the Correct Arm Configuration
Don’t touch the pads just yet - look at the vehicle’s wheelbase, door length, and lift points, first. Extend the arms enough to reach the factory lift zones without maxing out the telescoping range. Front arms usually need more adjustment on unibody cars. Rear arms tend to sit farther out on trucks and SUVs.
Keep both front arms set to a similar length and both rear arms balanced. Uneven extension can shift weight distribution once the vehicle leaves the ground. If the lift supports multiple arm positions, start with a neutral setup and fine-tune after checking where the pads will land.
This is the stage where you’ll select adapters. Use height adapters when the lift point sits higher than the rocker panel or when frame rails vary in height from front to rear.
Proper 2-Post Car Lift Positioning
As far as actually understanding how to position a car on a 2-post lift, it’s pretty simple. Drive in slowly until the front tires pass the posts. The “balance” sweet spot for most vehicles is when the center of gravity sits slightly behind the columns (especially on asymmetric lifts). Watch the mirrors or use a spotter to keep equal spacing between both posts.
Set the parking brake once you’ve stopped and leave the transmission in gear (manual transmission) or park (automatic transmission). Swing the rear arms to near the back lift points first. Then adjust the front arms. This prevents pushing the car forward while working around it.
Stand back and look at the vehicle from the front. The rocker panels should appear level with the arms extended evenly on both sides. Reposition the vehicle if one arm looks stretched farther than the others - do not force pad placement.
Spotting Factory Lift Points
Every vehicle has reinforced areas intended to support lifting. These are often pinch welds, frame rails, crossmembers, or designated pad boxes marked in service manuals.
- Most modern vehicles have small triangular notches or reinforced seams indicating where a lift pad should sit.
- Trucks with ladder frames often use the flat frame rails behind the front wheels and ahead of the rear axle.
- Electric vehicles may have covered battery trays, so double-check manufacturer diagrams before placing pads.
Avoid suspension arms, exhaust tubing, or floor pans that can flex under load. Not only is lifting from these points unsafe, but it can cause damage to vehicle components.
The rule of thumb for how to position a car on a 2-post lift is simple: look up the vehicle’s lift chart if you’re unsure! This is not something you want to play the guessing game with.
Setting the Lift Pads Correctly
Once the arms are in position, dial in the pad height so all four contact points reach the lift points at the same time. Uneven pad adjustment is one of the fastest ways to tilt a vehicle during the rise.
Turn the threaded pads until each corner sits square. Take a moment to double-check from the front and rear, confirming the arms mirror each other and one side isn’t stretching farther out.
Performing the Initial Test Lift
Bring the vehicle 6-12 inches off the ground before sending it all the way up. Pause and inspect everything. The pads should stay centered on the lift points, the arms should be locked, and the vehicle should sit level without shifting.
Give the vehicle a controlled push at the front and rear bumper. You’re checking for movement, not trying to rock it off the lift on purpose. Lower the car and reposition the arms if anything feels unstable. Listen for popping, slipping, or uneven hydraulic travel.
Raising the Vehicle to Working Height
Continue lifting in a smooth, controlled motion. Watch the columns and arms during the rise. Both sides should climb evenly. Stop at the height that gives you proper access instead of automatically going to full extension.
When you do reach working height, lower the lift slightly onto the mechanical safety locks. The locks carry the load while you work underneath, not the hydraulic pressure alone. Verify that both columns are resting on the same lock position so the vehicle stays level.
Check overhead clearance for mirrors, open hoods, or roof racks before moving tools or stepping under the vehicle. Then, you can get to work!
Lowering the Vehicle Safely
Clear tools, stands, and people from the work area before lowering. Raise the lift just enough to disengage the safety locks, then activate the lock release and lower the vehicle slowly. Watch the arms during descent so they don’t snag rocker panels or exhaust components.
Once fully lowered, swing the arms clear before driving out. Avoid rushing this step. Most contact damage happens when the vehicle is coming off the lift, not going up.
How Lift Type Comes into Play (Symmetric vs Asymmetric)
It’s important that we touch on the differences between a symmetric vs asymmetric lift as it pertains to how to use a 2-post car lift.
- Symmetric lifts center the vehicle between the columns. Great for trucks, SUVs, and vehicles with long wheelbases that need more balanced weight distribution.
- Asymmetric lifts rotate the front arms rearward so the vehicle sits slightly back, giving more door clearance for drivers getting in and out during service.
This impacts where you stop the vehicle before lifting and how far each arm must reach. Match the arm style to the vehicle layout to prevent awkward pad placement and keep weight balanced across both columns.
Vehicle Types That Require Extra Care
There are some vehicles that need a little slower setup and more precise spotting - like long-wheelbase trucks and vans. These need maximum arm extension to reach the approved lift points.
On the other end of the spectrum, low-clearance sports cars might need low-profile pads or adapters to avoid body damage. EVs have heavy battery packs under the floor, so pad placement has to follow the manufacturer's diagrams exactly.
You should also inspect older unibody cars with rust or previous structural repairs before lifting, since weakened metal can flex under load.
Choosing the Right 2-Post Lift for Your Garage
You probably already have a lift installed if you came here looking for tips on how to use a 2-post car lift. But if you are still in the shopping process or want to upgrade, you’ve come to the right place. My Garage Supplies helps customers compare real measurements like column height, arm reach, drive-through clearance, and power requirements before they buy.
We carry proven brands like Triumph, AMGO, iDEAL, and others that fit both home garages and commercial bays. Every order comes with direct support from people who actually work with lift specs daily, so you’re not guessing at compatibility or installation details.
We carry all the other types of car lifts you could be curious about, too - like the 4-post car lift or single-post car lift. This is your one-stop shop for automotive shop equipment online. Get in touch today and find out why!
Parting Thoughts on How to Position a Car on a 2-Post Lift
That does it for our guide on how to position a car on a 2-post lift! Proper 2-post car lift positioning cannot be taken lightly, but fortunately, you should feel pretty confident in how to use a 2-post car lift at this point.
Remember, though, My Garage Supplies carries the best 2-post lifts from trusted brands, always backed by real support from people who know these specs inside and out. So if you’re still dialing in your setup, reach out to our team for personalized guidance!
Related Resources
2-Post Car Lift Space Requirements | 2-Post Lift vs 4-Post Lift | Scissor Lift vs 2-Post