
How to Install a Car Lift: Car Lift Installation Guide
The right car lift can transform your garage’s productivity, be it a hobby shop or a bustling commercial operation. Even after narrowing it down to the best car lift brands at My Garage Supplies, though, you need to navigate car lift installation.
Installing a car lift is NOT something ANYONE can do. We’re going to walk you through how to install a car lift below, just to show you what all goes into the process and help you understand if it’s viable for you to DIY.
That said, we almost always recommend leaving it to a professional if you don’t feel confident in your capabilities. From the anchoring to the electrical and hydraulic work, there’s a lot that goes into it. Here’s a quick look:
- Site preparation: Measure ceiling height, confirm floor strength, and make sure the concrete meets thickness requirements.
- Positioning and assembly: Unpack the lift, set columns or platforms in place, and bolt on arms or crossbeams.
- Anchoring to the floor: Drill holes and secure anchor bolts to keep the lift firmly in place.
- Electrical and hydraulic setup: Wire the power unit and connect hydraulic lines before filling with fluid.
- Testing the lift: Run it through a cycle without a vehicle first, then check alignment, locks, and safety features.
Whether you purchased a car lift for garage from us or not, we’re here to break all this down and more - starting with the car lift installation cost.
How Much Does a Car Lift Cost to Install?
There’s no one-size-fits-all answer on car lift installation costs, because there are a lot of variables to take into account. So how much does a car lift cost to install on average? Here’s a quick overview of what you can expect to pay based on the type of lift you’re installing:
- Single-post car lift: $500-$1,000 for installation
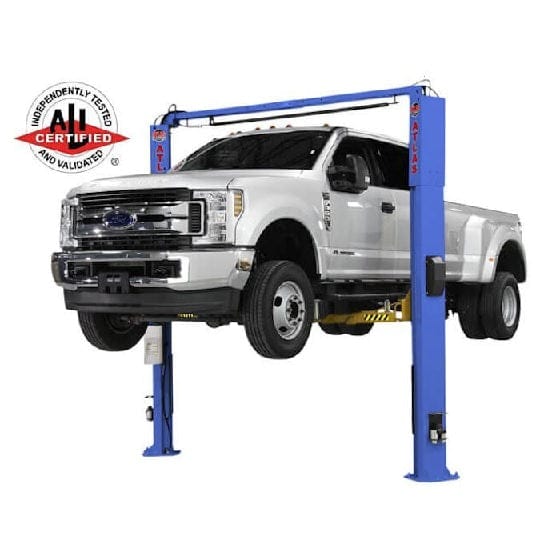
- 2 post car lift: $500-$1,000 for installation
- 4 post car lift: $1,000-$2,500 since they take more space and hardware
- Car scissor lift: $500-$1,200, typically less involved than full column lifts
Beyond the lift itself, though, there are quite a few other things you need to consider. Perhaps the most significant is the garage floor condition. Most lifts need a 4”-6” concrete slab rated for heavy loads. If your garage floor is too thin or cracked, you might need concrete reinforcement or repouring. That’s expensive.
There’s also the ceiling height and overall layout to take into account. A garage with low ceilings may require modifications to fit a 2-post or 4-post lift. Relocating lights, ducts, or storage adds time and labor costs.
Think about the electrical work, too. There will be different costs for a 110v vs 220v car lift, as it will dictate whether or not you really need to hire an electrician to install a dedicated circuit. In the same vein, filling and bleeding the hydraulic system takes time, and in some cases, specialized labor.
You should also remember that labor rates vary based on where you live. Hourly rates for the trades involved in car lift installation can range from $75-$150 per hour. But at the end of the day, expect to pay anywhere from $800 and $3,000 for labor and setup.
This begs the question, is installing a car lift on your own a viable option?
Can You Install a Car Lift Yourself? Pros and Cons of Installing a Car Lift DIY
Plenty of people consider tackling a car lift installation themselves. It sounds pretty straightforward on paper - bolt the posts down, wire it up, and you’re ready to lift. But there are a few things you might not be able to do, and you need to be realistic with yourself about this.
Tools & Skills Required for a DIY Installation
- Concrete drilling equipment: You’ll need a hammer drill capable of boring into 4”-6” of concrete to set the anchors.
- Torque wrenches and impact tools: For securing bolts and preventing future loosening.
- Hydraulic and electrical know-how: You’ll be routing hydraulic hoses and potentially wiring a 220V circuit.
- Lifting equipment: Columns and crossbeams are heavy, so you’ll likely need a hoist or multiple people just to move parts into position.
- Mechanical aptitude: Reading schematics, following torque specs, and troubleshooting alignment issues aren’t tasks for beginners.
Risks and Considerations When Installing a Car Lift on Your Own
We get asked all the time, are single post car lifts safe? Yes - provided you 1) install it correctly and 2) know how to use it properly. But it starts with proper car lift installation. A misaligned column or improperly torqued bolt could lead to catastrophic failure once the lift is under load.
But safety aside, missteps during installation could lead to cracked concrete, bent arms, or electrical shorts can turn a cost-saving attempt into a bigger expense. You should think about your warranty as well. Some manufacturers require professional installation for warranty claims.
Don’t forget the value of your time, either. The DIY route can take days compared to a few hours if you go the professional route. Yes, it could cost a thousand dollars or more - but if you can start servicing vehicles faster, you’ll make that money back in no time.
Bringing in a certified installer eliminates much of the guesswork and risk. Professionals know how to evaluate your garage floor, set the lift exactly to spec, and test all safety features before you drive a vehicle onto it.
Professional car lift installation is non-negotiable in some cases (like for commercial shops), as OSHA and insurance requirements come into play. We think it’s worth it for the peace of mind alone.
But we know you’re still curious about the process, so let’s get into how to install a car lift below!
How to Install a Car Lift: Overview of the Car Lift Installation Process
Installing a car lift can be broken down into just 6 steps - but there are multiple steps within each of these. Here’s how to install a car lift, starting with preparing the site.
Step 1: Site Preparation
First things first, how thick does concrete need to be for a car lift? Like we’ve touched on throughout this guide, you should double-check that your slab is at least 4”-6” thick and rated for the weight.
The area should be level, free of cracks, and clear of obstacles. Ceiling height is another consideration. Two-post and four-post lifts typically require 10’ or more of clearance.
Step 2: Positioning and Assembly
Once you feel good about the site itself, you need to unpack and lay out the lift. Columns, arms, or platforms are moved into position, which often requires multiple people or lifting equipment due to the weight of the components. Getting the alignment right now saves headaches later.
Step 3: Anchoring the Lift
Anchor holes are drilled into the concrete with the columns or bases in place. Heavy-duty anchor bolts are inserted and tightened to manufacturer specifications. Proper torque is paramount here, as the anchors are what keep the lift from shifting once vehicles are raised.
Step 4: Electrical and Hydraulic Setup
The lift’s power unit is mounted and wired to the appropriate circuit - home garage lifts can often be connected to your basic 110v circuit, but you’ll need 220v for commercial-grade models. This is where an electrician will be called in.
Then, hydraulic hoses are routed, fittings tightened, and the system is filled with fluid. Bleeding the system to remove air ensures smooth operation and consistent lifting power.
Step 5: Testing the Lift for Safety
There you have it, how to install a car lift! But the job isn’t quite finished yet. A lift is cycled empty several times to check for leaks, alignment issues, or loose connections before putting a car on it.
Only after passing those checks will a test vehicle be raised and lowered, verifying the locks, cables, and safety latches are functioning as designed.
Step 6: Final Adjustments and Training
All that’s left to do at this point is adjust cables and arms for even lifting. The installer (or an experienced lead) will walk through safe operating procedures, pointing out lock positions, weight limits, and maintenance requirements.
Safety Considerations During and After Installation
It’s important to note that there are essential PPE requirements for car lift installation - safety glasses, gloves, and steel-toe boots to name a few. Here are a few other safety considerations post-installation:
- Bolts should be re-torqued after the first few weeks of use.
- Hydraulic fluid, cables, and safety locks should be inspected regularly.
- Commercial operations may need inspections or certifications to stay within OSHA or local safety standards.
And that’s it - now you know how to install a car lift!
Closing Thoughts on Car Lift Installation
From preparing the floor to wiring the power unit, every step in car lift installation matters for safety and performance. The key takeaways are that working with a professional is typically the best bet when it comes to installing a car lift.
Our blog has additional resources on topics like the 2-post car lift space requirements if you want to learn more. You can also connect with our team to find the perfect lift for your garage if you’re still in the buying process. My Garage Supplies stocks the best models from the top brands, and backs them with world-class customer service from A to Z.
Get expert guidance and the best prices online when you buy your lift with us. Reach out today!